
Objective
To grant, modify, or revoke user access in Google Analytics 4 (GA4), manage account/property settings, configure data stream preferences, and maintain data governance using the Admin interface.
Overview
In this SOP, you’ll learn how to:
- Add and manage users and roles
- Configure data settings, retention, and restrictions
- Modify or delete properties and data streams
- Track changes via account history
- Use the Admin menu for deeper account management
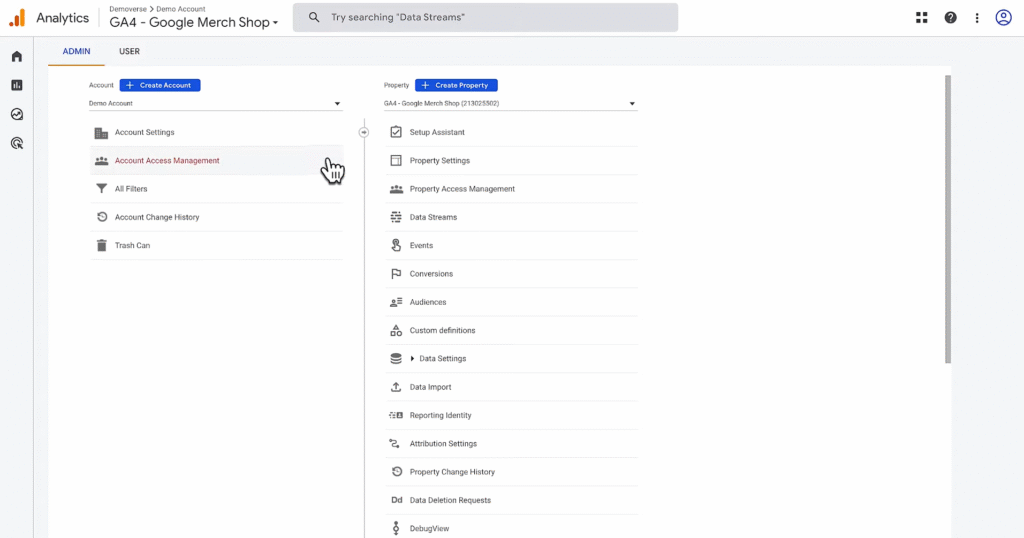
Step 1: Understand the Admin Menu in GA4
The Admin menu in GA4 is where you manage:
- Users and permissions
- Accounts, Properties, and Data Streams
- Advanced tools like:
- Custom dimensions & metrics
- Audiences
- Data settings and retention
- Deletion recovery (Trash Can)
You can access the Admin panel by clicking the gear icon (⚙️) in the lower-left corner of your GA4 property.
Step 2: Add or Remove Users
To grant access to colleagues or team members:
- In the Admin menu, under the Account or Property column, click Account Access Management
- On the screen below, you can view who has access to your account and the level of permission they have.
To add a user: Click the + button (top right) → Add Users
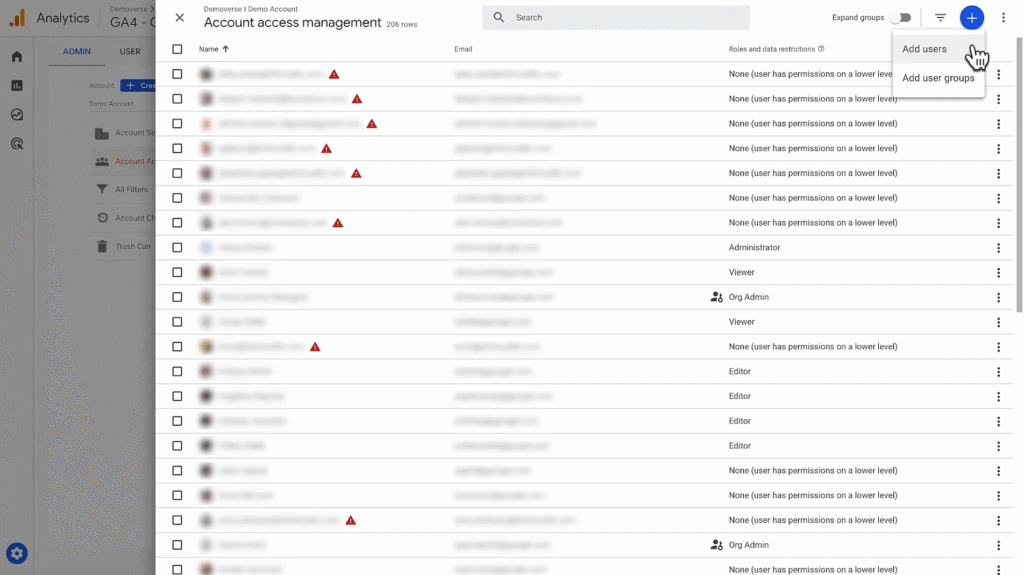
- Enter the user’s Google email address
- Select one or more Roles (see description of each role below)
- Optionally, apply Data Restrictions (e.g., hide cost or revenue data)
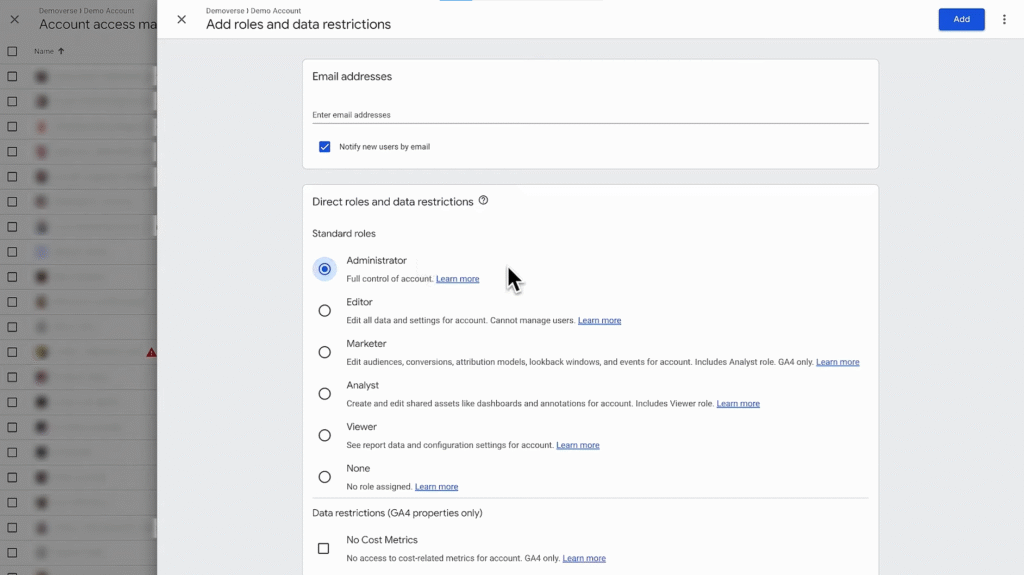
- Click Add
Note: You can grant access at either the Account or Property level. Roles are inherited downward.
User Roles and Permissions
Each role builds upon the permissions of the ones below it:
| Role | Permissions |
| Administrator | Full control of account + user management |
| Editor | Edit account settings and assets; cannot manage users |
| Marketer | Create/edit audiences, conversions, events, attribution models |
| Analyst | Create/edit shared reports and explorations |
| Viewer | View reports and data; can apply comparisons but not save changes |
| None | No access unless granted through another property or account |
Example: If Jason gives his head buyer the “Analyst” role, they can explore reports but cannot change tags or settings.
Apply Data Restrictions (Optional)
When adding or editing a user, you can restrict access to:
- Cost metrics (e.g., ad spend from Google Ads or other platforms)
- Revenue metrics (e.g., transaction value, ecommerce revenue)
These restrictions are ideal when dealing with business-sensitive information or external collaborators.
Leave these unchecked for team members who need full reporting visibility.
Step 3: Edit or Remove Users
To manage existing access:
- Go to Access Management
- Click the 3-dot menu beside a user’s name
- Choose Edit roles or Remove user
Only Administrators can manage user permissions.
Step 4: Configure Key Account & Property Settings
Within the Admin panel, you can:
Edit Property Settings:
- Time zone and currency
- Property name
- Linking to Google Ads or BigQuery
Edit Data Stream Settings:
- Modify web/app stream configurations
- Enable or disable Enhanced Measurement
- Configure tag settings
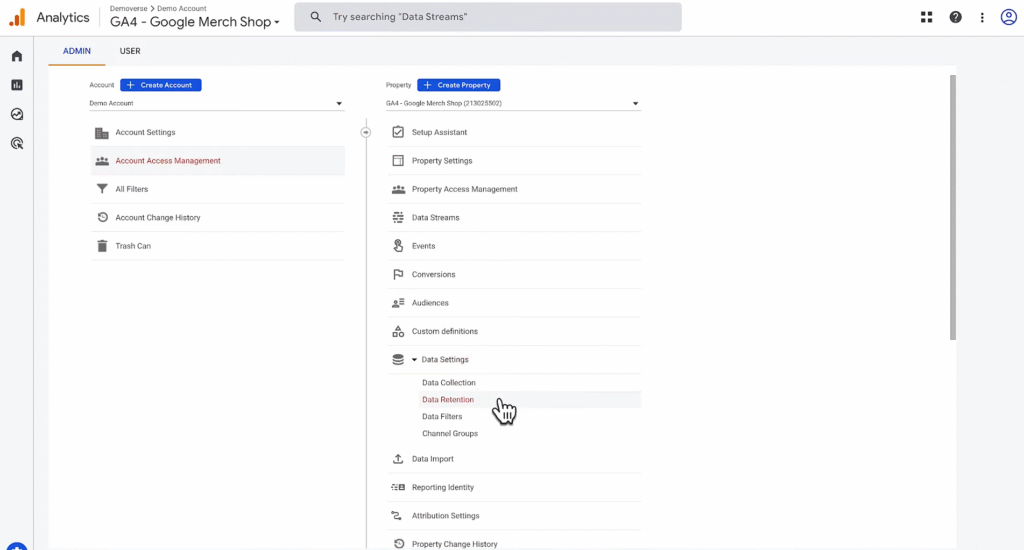
Edit Data Collection Settings:
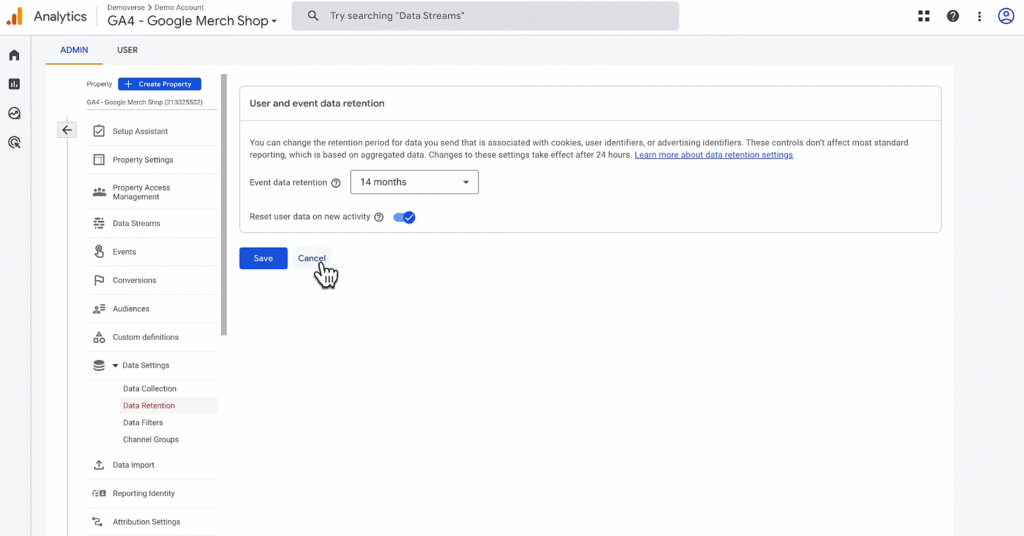
- Navigate to Admin → Property → Data Settings
- Adjust data retention duration (e.g., 2 months or 14 months)
- Control user-ID, event filtering, and more
Step 5: Delete a Stream, Property, or Account
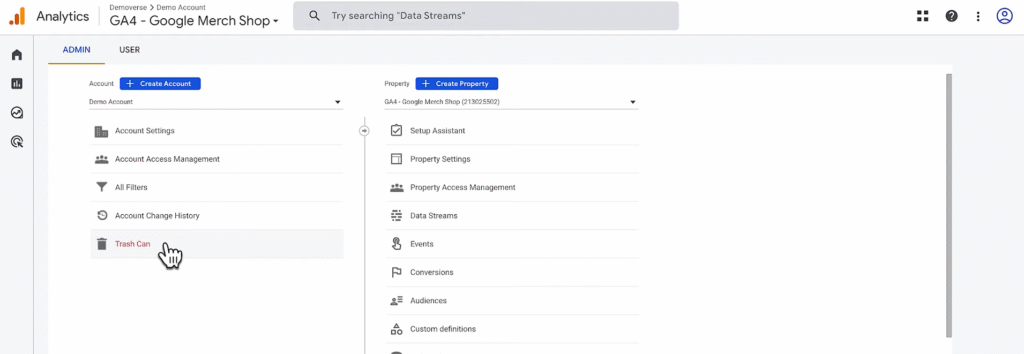
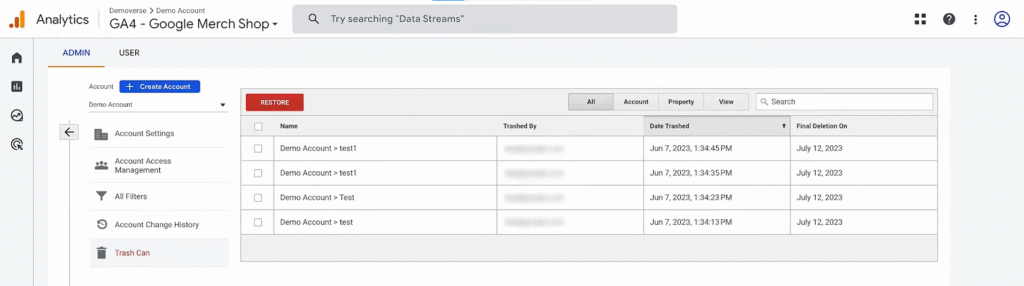
If needed, you can delete GA assets using the Trash Can feature:
- In Admin, select the asset (Account, Property, or Stream)
- Choose Trash Can
- Items stay in trash for 35 days and can be restored within that period
Step 6: Use Account Change History
To track changes made by you or other users:
- Go to Admin → Account Settings → Account Change History
- View user actions such as:
- New users added
- Properties edited
- Data settings updated
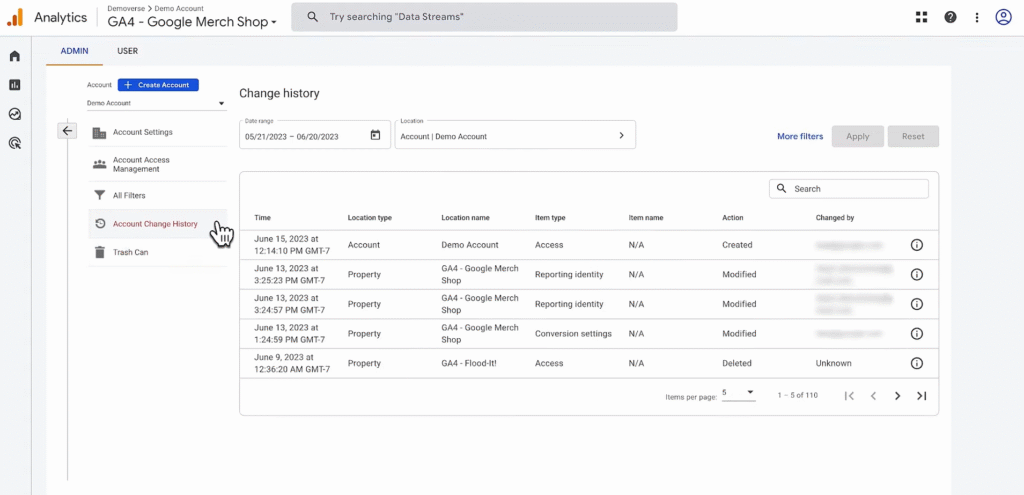
This is useful for audit tracking and access transparency.
Note
- Roles can be granted at different levels (Account vs. Property) depending on access needs
- Always assign least privilege necessary to maintain data security
- If you can’t locate a setting, use the Search bar in the Admin interface for quick access