
Step 1: Sign in to Google Tag Manager
- Go to: https://marketingplatform.google.com/about/tag-manager/
- Sign in using your Google account (preferably the one used for Google Analytics or other Google tools).
- Click “Create Account”.
Step 2: Create a New GTM Account
Fill in the required fields:
- Account Name:
Use your company or website name (e.g., MyBusiness)

- Country:
Select your country. - Container Name:
Use your website URL or platform name (e.g., mybusiness.com)
Your container name can be as simple as the site or the app name where you will use this container.
- Target Platform:
Choose one of the following:- Web (for websites)
- iOS / Android (for apps)
- Server (for server-side tagging)
You have to choose where this container is going to be placed, whether it’s a web, which is a simple website, iOS app, Android app or accelerated mobile pages (AMP), which is simply a website for mobile.
→ For a website, select Web.
Click Create.
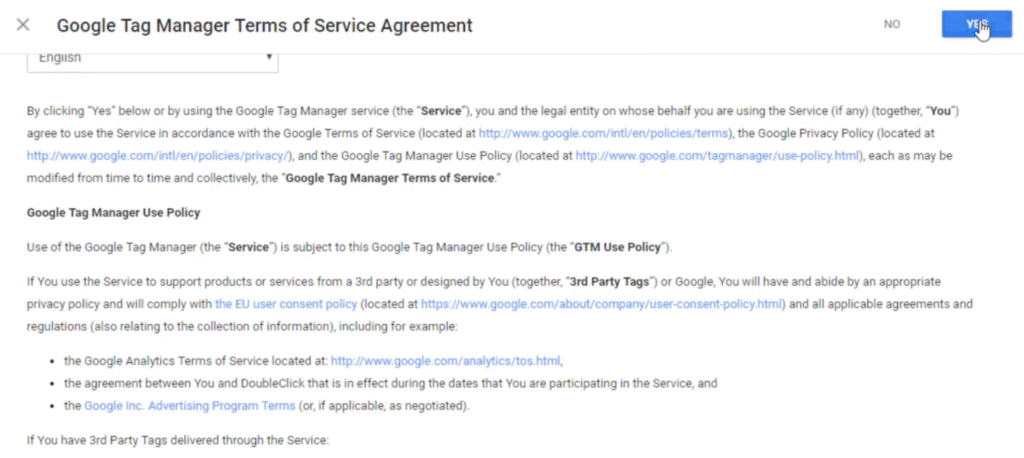
Step 3: Accept Terms and Conditions
- Read and accept Google’s Terms of Service.
- Click Yes or Agree to continue.
If you’re prompted for Google Tag Manager terms of service, go ahead and read them and once you’re satisfied, go ahead and click Yes.
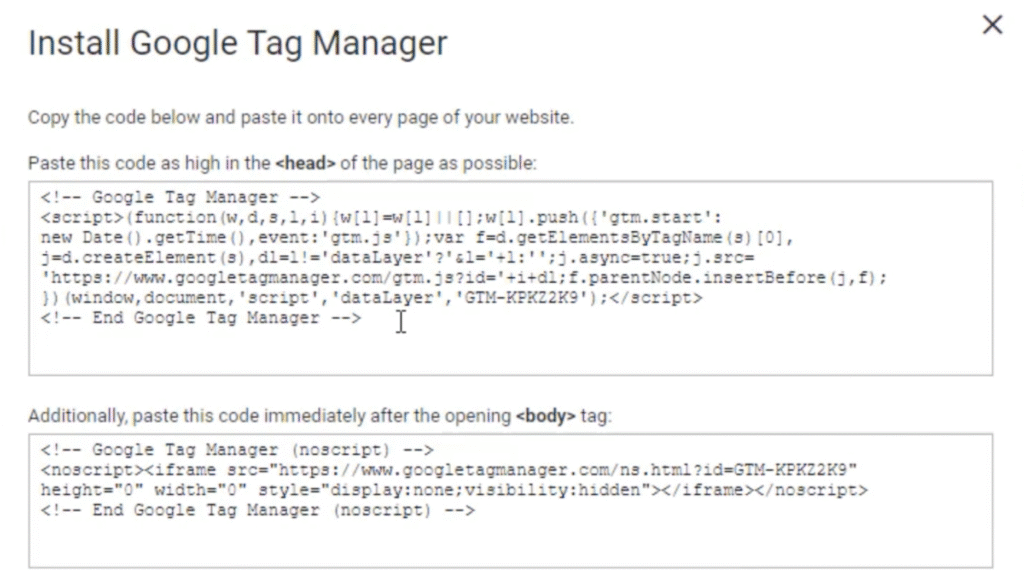
Step 4: Install GTM on Your Website
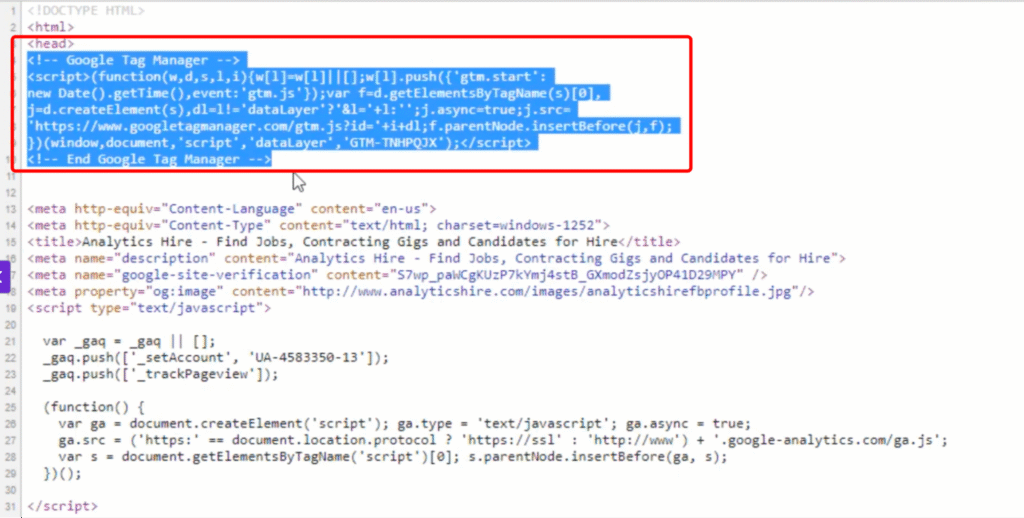
After account creation, GTM will show two code snippets:
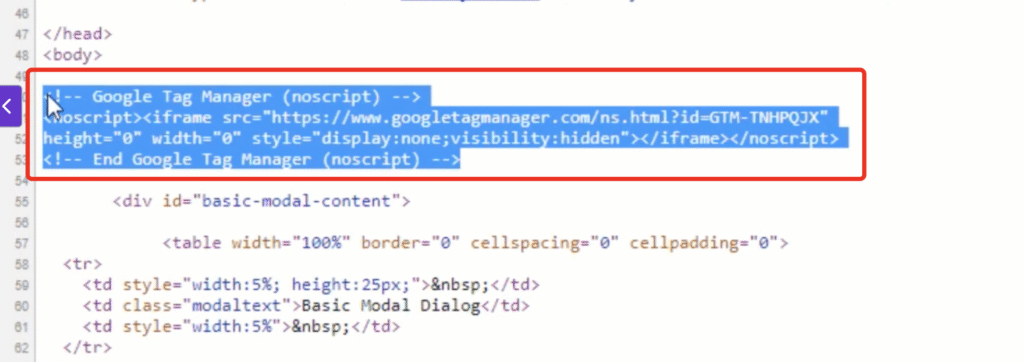
- Header code (to be placed in the <head> of your site)
- Body code (to be placed right after the opening <body> tag)
You have two options:
a. Manual Installation (recommended if you have access to the source code):
- Copy and paste both codes into your website as instructed. This can be done via your development team.
- Take screenshots similar to the images below and copy and paste BOTH the <head> tag and the <body> and send these to the development team.
- The instructions should be “Install this code in the <head> of all pages on the website {paste the code} and this code in the <body>: {paste the code}
b. CMS Integration (e.g., WordPress, Shopify):
- Use a GTM plugin or built-in integration.
- Paste only your GTM container ID (e.g., GTM-XXXXXXX).
After it’s done creating the account, it’ll give you the Google tag manager code that needs to go on your pages. You have two snippets of code here: One goes into the head, and the other goes into the body of your web page.
Go ahead and copy these and send them to your developer or I.T. team.
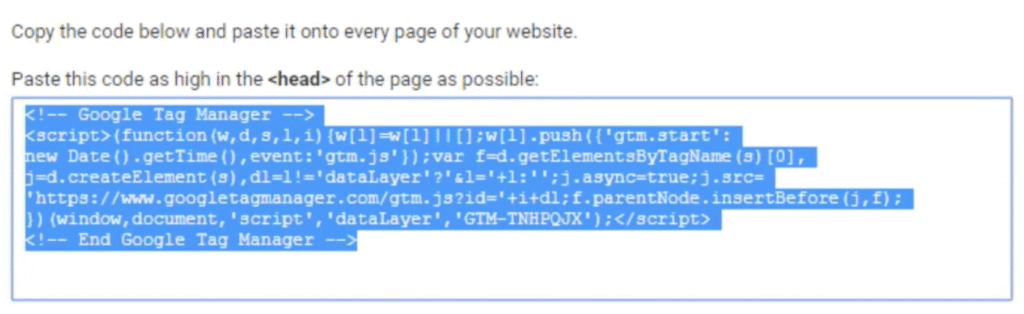

And if you have access to the code for your Web pages, you can simply take the code from here and copy it. Once you have copied them, go ahead and click.
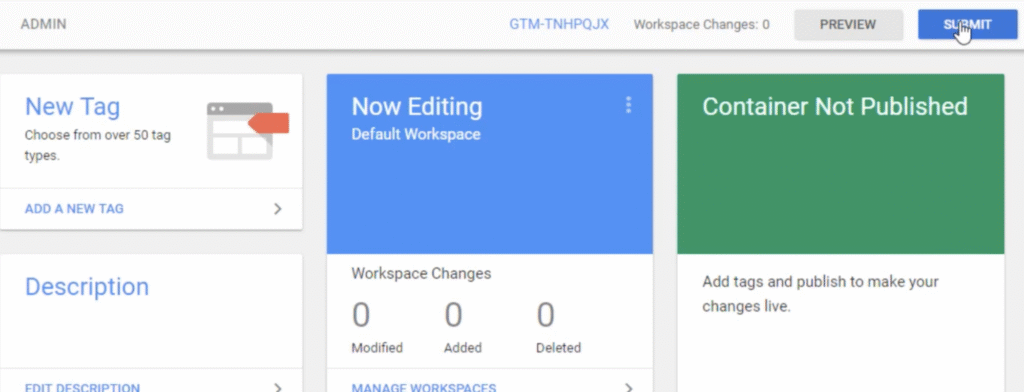
Once you are ready to publish, it means you are ready to push it out on your site. You go ahead and click submit.
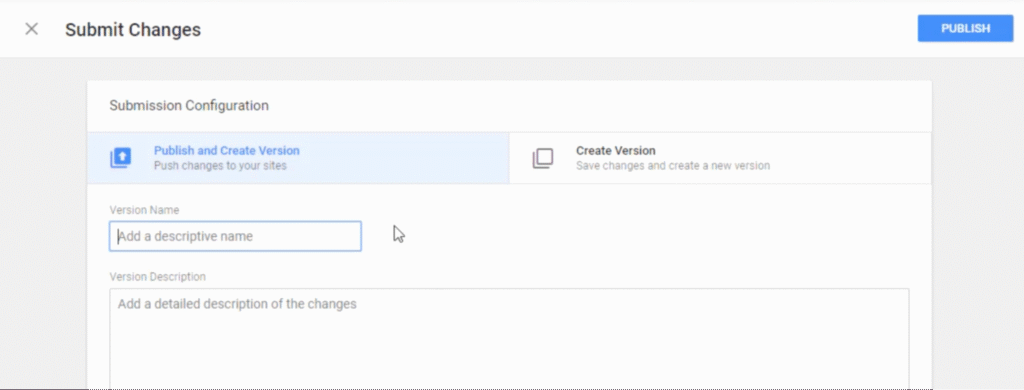
This allows you to create versions and publish them or just create different versions.
Versioning allows you to keep track of all the changes you have been making to your container so you can go back in future and look at what changes were made, at what point.
Go ahead and give a descriptive name to your version.

Once you are ready, you can publish to an environment.
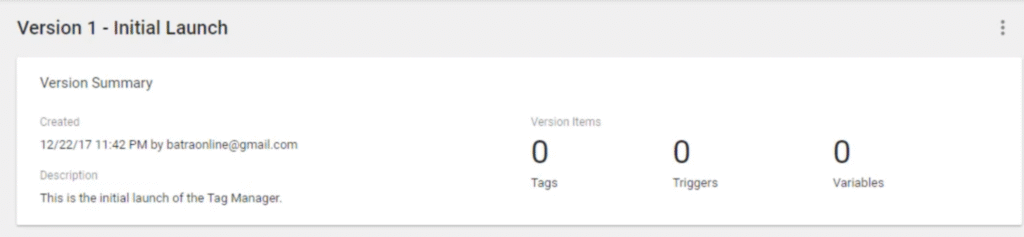
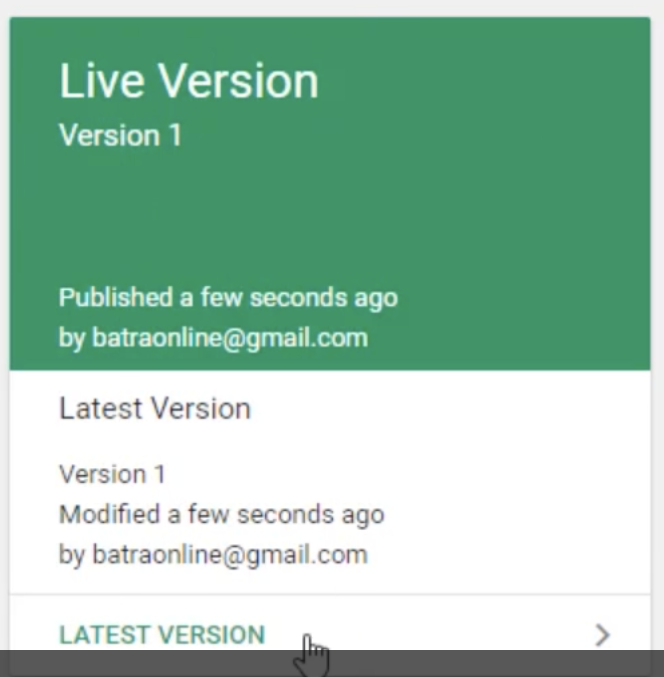
Once that’s done, go back to your workspace and you will see now the version is live.
Example of the tag on a live site.
Step 5: Confirm GTM is Installed Correctly
- Install the Tag Assistant Chrome extension (optional but helpful).
- Visit your site.
- Open Tag Assistant → It should detect GTM running.
- You can also use the Preview mode inside GTM to check.
Step 6: You’re Ready!
Now your GTM is live. You can begin creating:
- Tags (e.g., GA4, Facebook Pixel)
- Triggers (e.g., clicks, page views)
- Variables (e.g., URLs, button text)