
Step 1: Sign in to Google Tag Manager
- Go to https://tagmanager.google.com
- Sign in using the Google account that owns or has Admin access to the GTM account.
Step 2: Open the Correct GTM Account & Container
- Once logged in, you’ll see a list of GTM accounts and containers.
- Click on the correct Account Name.
- Inside the account, make sure you’re in the correct Container (e.g., GTM-XXXXXXX).
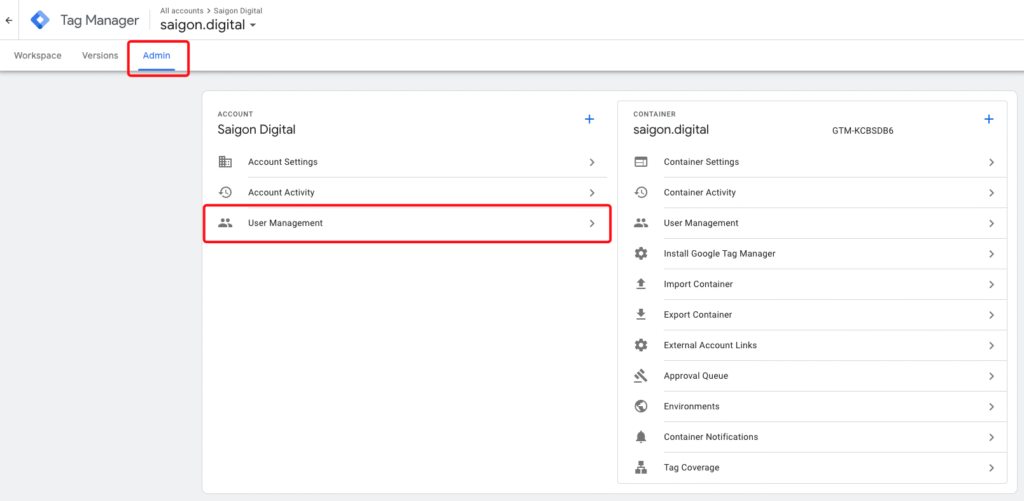
Step 3: Go to Admin Settings
- In the left sidebar, click on “Admin” (bottom left corner).
- You’ll see two columns:
- Account column
- Container column
Step 4: Click “User Management”
You have two options:
Option A: Add user to Account level
- Click User Management under the Account column.
- Gives access to all containers inside the account.
Option B: Add user to a specific Container only
- Click User Management under the Container column.
- Restricts access to only that container.
Step 5: Add a New User
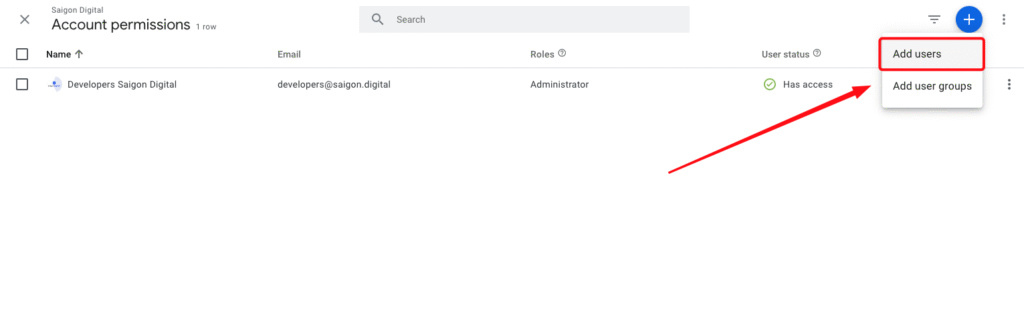
- Click the blue + button in the top-right corner
- Select “Add users”
- In the email field, type the user’s Google email address (must be Gmail or a Google Workspace email)
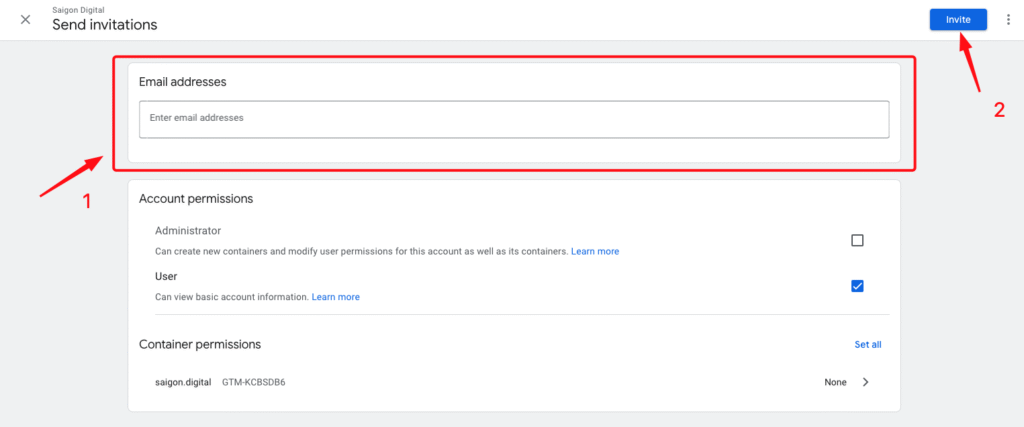
Step 6: Set Permissions
Account Permissions:
- Admin: Can manage users and containers
- User: Can only view or work with containers
Container Permissions (choose one or more):
- No access
- Read
- Edit
- Approve
- Publish
For most collaborators, choose:
- Edit + Publish (if they manage tags and push changes)
- Read only (if they just monitor or audit)
Step 7: Click “Invite”
- Review the permissions you set
- Click “Invite”
- The invited user will receive an email and can accept access