Objective
To automatically detect and track JavaScript errors on your website using GTM, and send them to Google Analytics 4 as custom events (e.g. js_error), including useful error details.
Step 1: Enable Built-in Error Variables in GTM
- Go to Google Tag Manager
- Click Variables in the left menu
- Click “Configure” (top right)
- Scroll down to Errors, and enable:
- Error Message
- Error URL
- Error Line
- Error Stack Trace (optional but useful)
Step 2: Create a Trigger for JavaScript Errors
- Go to Triggers → Click “New”
- Name the trigger: JS Error – All Pages
- Trigger Configuration → Select Trigger Type: Error
- Choose: This trigger fires on All JavaScript Errors
- Click Save
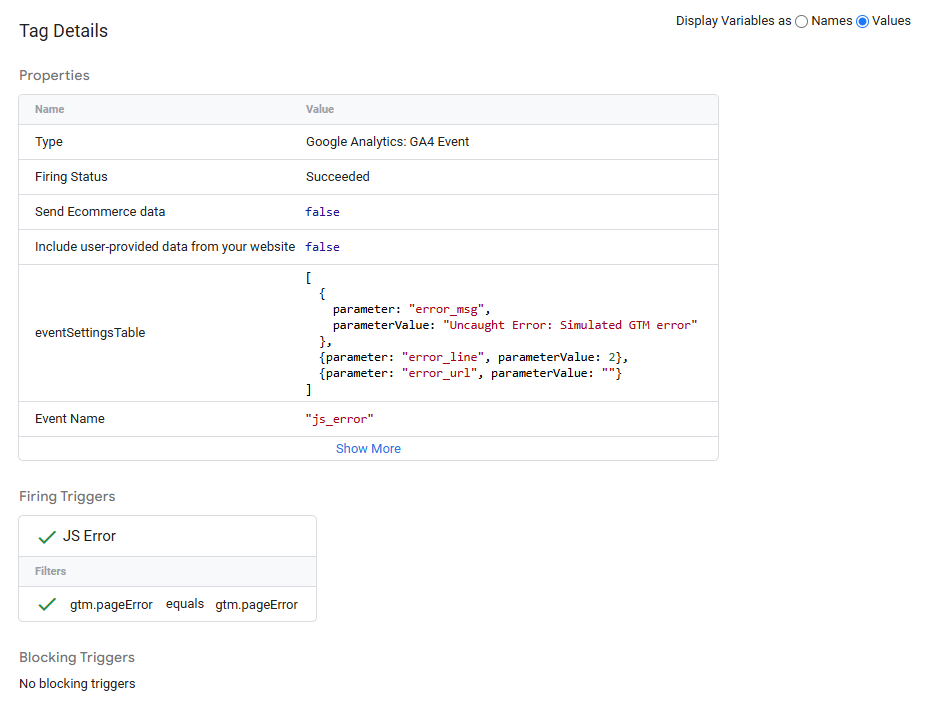
Step 3: Create the GA4 Event Tag
- Go to Tags → Click New
- Name it: GA4 – js_error
- Tag Configuration → Select Google Analytics: GA4 Event
- Under Configuration Tag, select your existing GA4 config
- Event Name: js_error
- Add Event Parameters (optional but useful for analysis):
| Parameter Name | Value |
| error_message | {{Error Message}} |
| error_url | {{Error URL}} |
| error_line | {{Error Line}} |
(Optional: Add error_stacktrace with {{Error Stack Trace}})
Step 4: Link the Trigger to the Tag
- Scroll down to Triggering
- Choose the trigger: JS Error – All Pages
- Click Save
Step 5: Preview and Test (Optional)
Testing JavaScript errors is tricky since real errors may not be consistent. You can simulate one manually in the browser console.
Simulate a test error:
- Open your website
- Open Developer Console in your browser (F12 or right-click → Inspect → Console)
- Paste this line and press enter:
setTimeout(function () {
throw new Error(“Simulated GTM error”);
}, 1000);
- In the Tag Assistant Preview, check if:
- A js_error event appears
- Your GA4 tag fires with the correct parameters
Step 6: Publish
Once tested and verified:
- Click Submit → Publish in GTM
- Name the version: GA4 – JavaScript Error Tracking